This tutorial will walk you through how to set up Ubuntu Server on your Raspberry Pi 5.
“Why would you want to do that?” you might ask. Well… Cloud is incredibly expensive. It might make sense for enterprises that save money on employees that maintain infrastructure. I kinda doubt that too, I might write an article on that too. But for someone just developing hobby projects and experimenting with technology, it makes absolutely no sense.
Let’s compare apples to apples. A Pi 5 has a 4-core processor @ 2.4GHz, 8 GB RAM (you can opt for 16GB if you want) and whatever storage you choose to put in it. It retails at about $100. A decent microSD card will be $10-$20.
Ok, not let’s try to find something close to that in the cloud. I’ll look at AWS in Frankfurt, cause I’m located in Europe. There are a bunch of 4-vCPU, 8GB RAM instances you can choose from, but the cheapest I see at the time of this writing is c6g.xlarge @ $0.1552/hour. But let’s say we can manage with less CPU power, so we’re willing to look at 2 vCPU instances. Here we have t3.large @ $0.096/hour.
$0.096 * 24 = $2.304 / day
$2.304 * 30 = $69.12 / month
So in 2 months you’re paying more than the price of the Raspberry Pi 5, which will give you more CPU performance. Not just because it has 4 cores vs the 2 vCPUs in the t3.large, but also because of virtulization. I’m not an expert in this by any means, but I’d always choose physical cores over vCPUs.
To me, this is ridiculous. So I chose to self-host my stuff.
Raspberry Pi Imager
Download and install Raspberry Pi Imager for your desired operating system. To be clear, this means the OS you are running on your PC, from which you will write the Pi’s microSD card. Download from: https://www.raspberrypi.com/software/ .
Install Ubuntu
Ideally, remove an external storage device other than the microSD card (or card adapter, depending on what you are using). This is just to avoid any confusion and format the wrong drive.
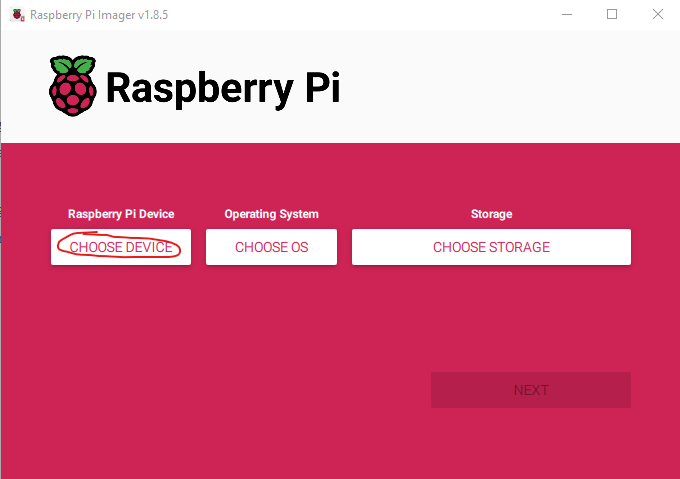
Open the Imager and click ‘Choose Device’:
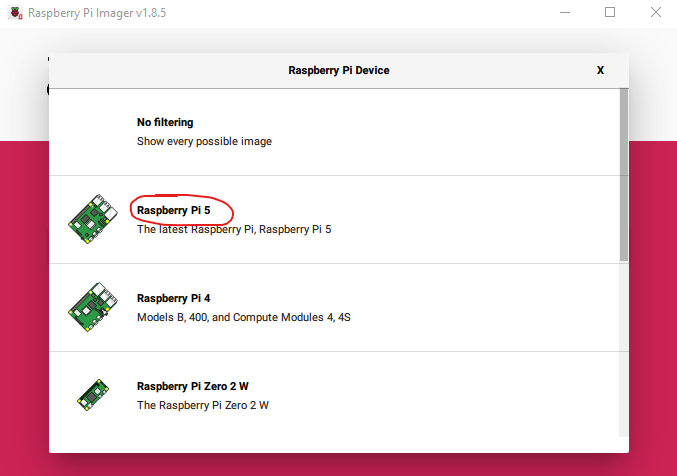
Choose ‘Raspberry Pi 5’ (or whatever Pi you are using):
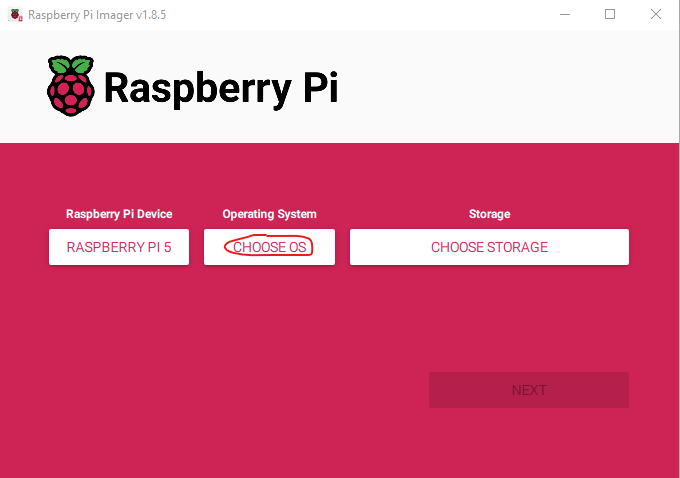
Now click ‘Choose OS’:
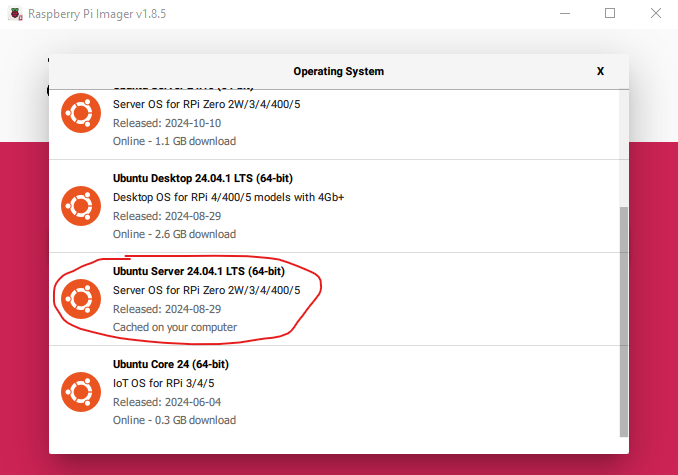
Choose ‘Other general-purpose OS’ – ‘Ubuntu’ – ‘Ubuntu Server 24.04.1 LTS (64-bit)’ (or whatever LTS version you find when you read this):
Click ‘Choose Storage’:

Choose your card:

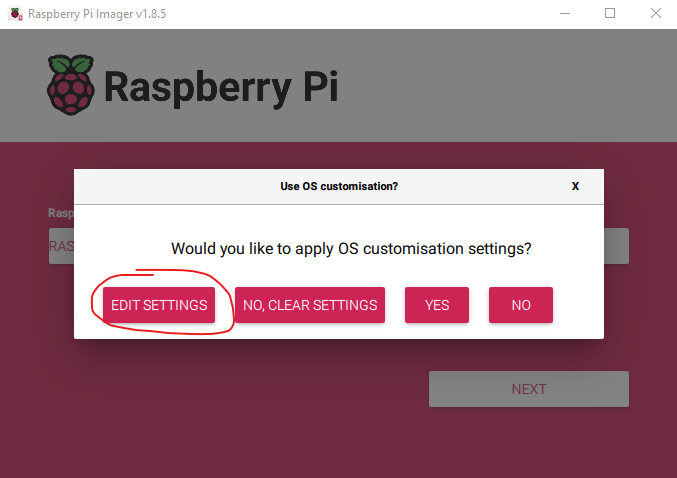
Click Next. You will be prompted with the following dialog. Click Edit settings:
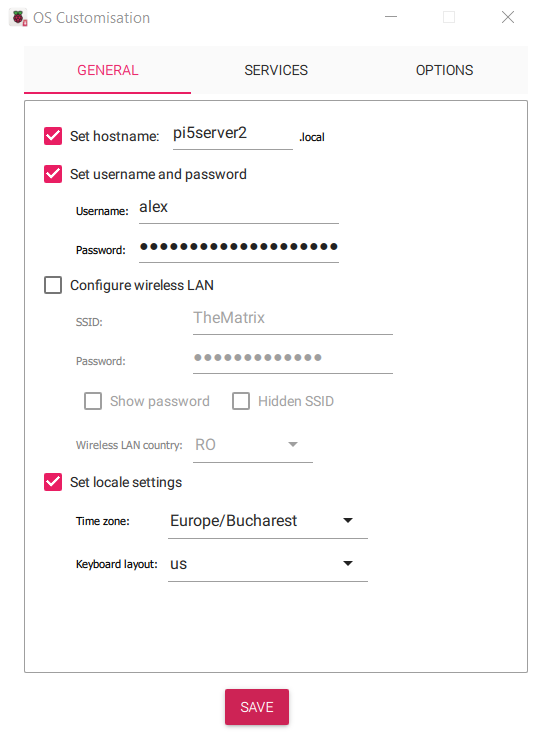
In the General tab, give your Pi a hostname, a username and password that you will use to connect to it. If you want it to use WiFi, check ‘Configure wireless LAN’ and enter the SSID (the name of your network), Password and your country. If you plan to use an ethernet cable on your Pi, you can leave it unchecked. Check the Set locale settings checkbox and choose your time zone and the desired keyboard layout.
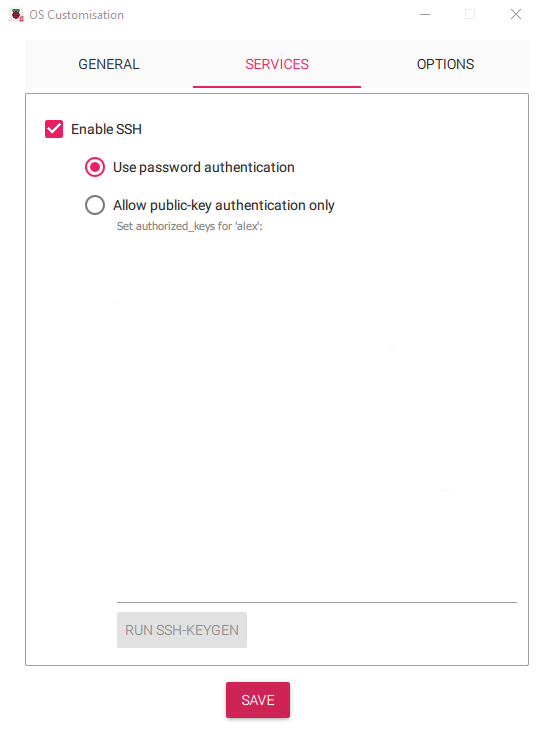
In the Services tab, make sure Enable SSH is checked and Use password authentication. If you want to use an ssh key to authenticate, you can use the second option, but make sure you know what you’re doing. You probably don’t need this tutorial if you do.
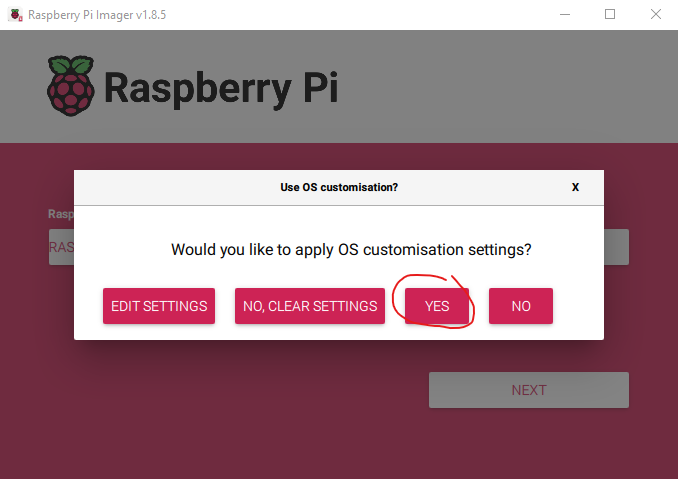
That’s it, now click Save. It will bring you back to the OS customization dialog, where you should now click Yes:
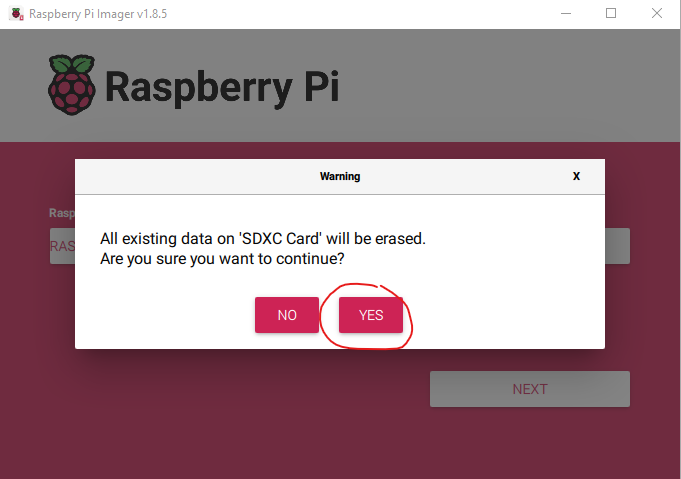
At the next prompt click Yes to confirm formatting the card:
It’s going to take a while for the card to be written. Once it’s done you will see this screen:
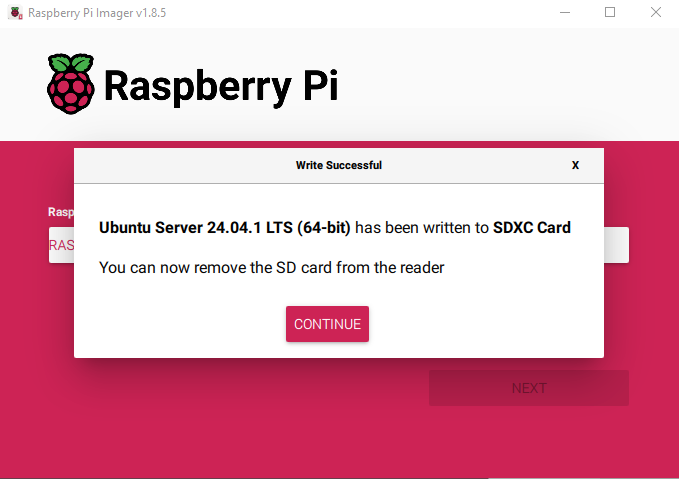
That’s it, your Ubuntu Server is now installed. Now insert your microSD card into the Pi and start it up. If you wish, you can connect a screen to the HDMI port and a keyboard to the USB port, but if you give it a few minutes after it starts, you should be able to ssh into it. However, do make sure you give the Pi enough time on the first boot (5-10 min), since it needs to do a bunch of things and Ubuntu Server is not very visual about the state. When it’s ready you can use the username and password you provided to ssh into it:
$ ssh [email protected]
The authenticity of host 'pi5server2.local (fe80::2ecf:67ff:fe7d:b06%13)' can't be established.
ECDSA key fingerprint is SHA256:BNBbHxdN+Bvj7EmXhXsAFTESFHHVjfLccWXOsDguEPk.
Are you sure you want to continue connecting (yes/no/[fingerprint])? yes
Warning: Permanently added 'pi5server2.local,fe80::2ecf:67ff:fe7d:b06%13' (ECDSA) to the list of known hosts.
[email protected]'s password:
Welcome to Ubuntu 24.04.1 LTS (GNU/Linux 6.8.0-1010-raspi aarch64)
You can now start installing stuff on it. I suggest you start with Docker.
Hope this helps, have fun clickity-clacking.
Leave a Reply