If you find yourself wanting to self-host some website(s) from your home network, you might run into the issue that most ISPs do not provide a static IP to home users. So if your public IP occasionally changes, you are going to have to update your domain’s A record to point to the new IPv4. But you wouldn’t want to do that manually each time your restart your router or your power goes out.
Enter DDNS. It basically works by running a piece of software on your network that monitors your public IP and, when it changes, the service automatically updates the DNS record(s) to point the domain name to the new IP address. This ensures that the domain name always resolves to the correct, current IP address.
Luckily, someone already built such a piece of software for Cloudflare, it uses the Cloudflare API to update your DNS records. Here is the Github repo to the project if you want to thank the guy or contribute to the project: https://github.com/timothymiller/cloudflare-ddns .
Get Cloudflare API token
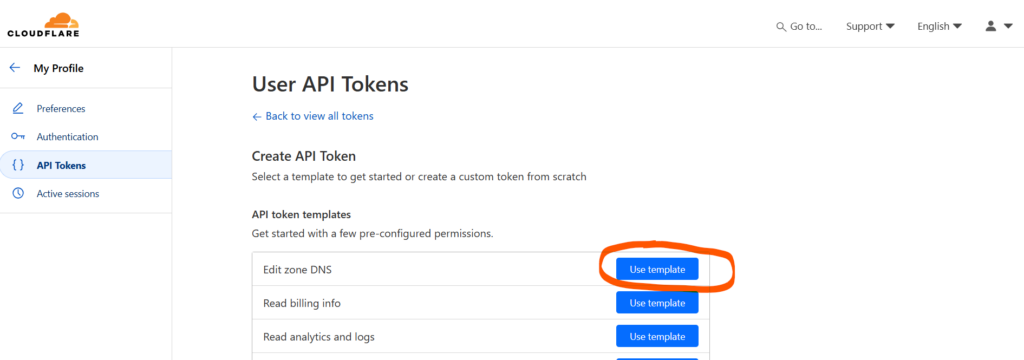
In your Cloudflare account, go to ‘My Profile’ – ‘API Tokens’ – ‘Create Token’. Generate a Cloudflare API token with ‘Edit Zone DNS’ permission.
On the next page you can either choose ‘Specific zone’ and select the domain you want to do this for, or ‘All zones’, which allows you to use the same token for all your domains. And yes, Cloudflare calls your domains ‘zones’ for some reason.
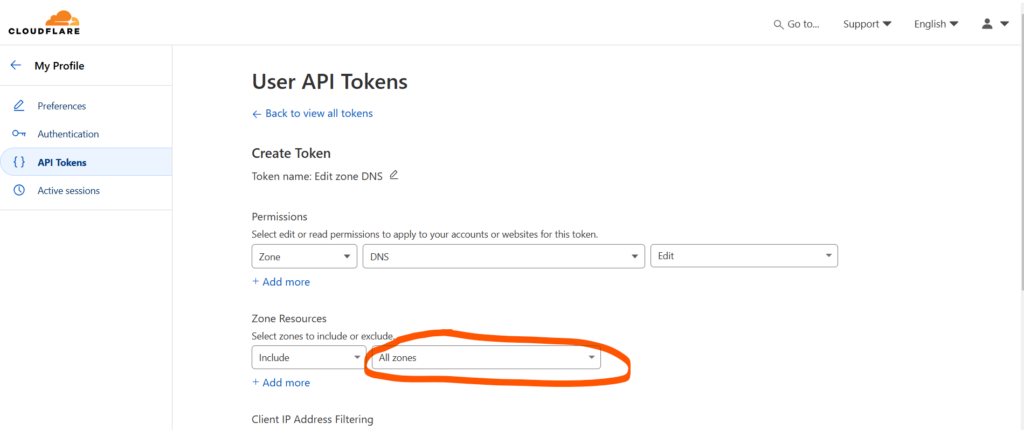
Then click ‘Continue to summary’ at the bottom and on the next page click ‘Create token’.
Save the generated token somewhere, you will not be able to retrieve it later on. If you lose it, you’ll have to create another one.
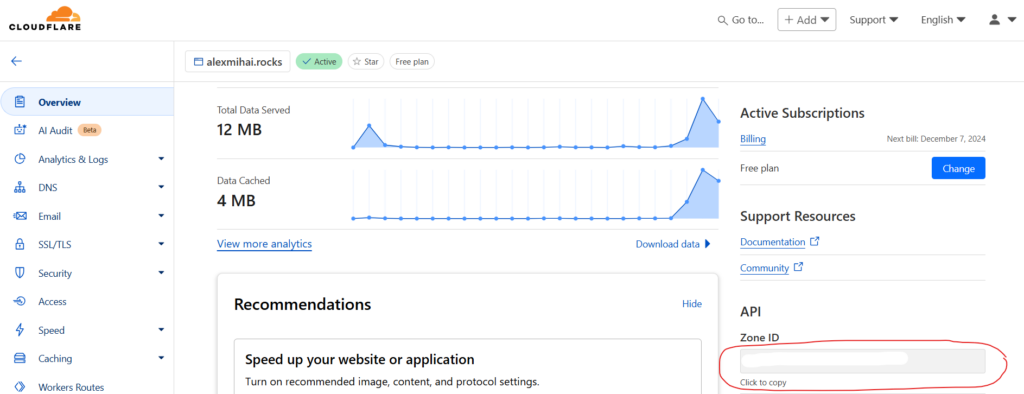
From your domain’s ‘Overview’ page, retrieve the ‘Zone ID’, we’re going to need it.
Run with Docker Compose
We will set this up using Docker Compose. First, create a folder for your stack, I created mine at ~/docker/cloudflare-ddns. Inside it we will create 2 files, docker-compose.yml and config.json.
Here are the contents of the docker-compose.yml file:
services:
  cloudflare-ddns:
    image: timothyjmiller/cloudflare-ddns:latest
    container_name: cloudflare-ddns
    security_opt:
      - no-new-privileges:true
    network_mode: 'host'
    environment:
      - PUID=1000
      - PGID=1000
    volumes:
      - /home/alex/docker/cloudflare-ddns/config.json:/config.json
    restart: unless-stopped
The file is taken exactly from the cloudflare-ddns repo (link). Here’s some explanation of the moving parts:
no-new-privileges: true– This is a security setting that prevents the container from gaining additional privileges. Even if the container or processes within it attempt to elevate their privileges, they will be denied.network_mode: 'host'– This setting allows the container to use the host’s network stack directly. It means the container will share the host’s IP address and network interfaces.PUID=1000andPGID=1000– These environment variables specify the user ID and group ID the container should run as./home/alex/docker/cloudflare-ddns/config.json:/config.json– Maps the config file on the left side on the host system to the container’s/config.jsonpath. For me it’s the path you see, put in whatever matches your config file.restart: unless-stopped– This policy makes sure the container will always restart if it stops unexpectedly, unless it was explicitly stopped by the user. This ensures thecloudflare-ddnsupdater keeps running to maintain your DNS updates.
Here’s a config.json file that’s a bit more complex, it assumes you have 2 domains and the second one has a subdomain api.example.com:
{
  "cloudflare": [
    {
      "authentication": {
        "api_token": "<your-api-token>"
      },
      "zone_id": "<domain-1-zone-id>",
      "subdomains": [
        {
          "name": "",
          "proxied": true
        }
      ]
    },
    {
      "authentication": {
        "api_token": "<your-api-token>"
      },
      "zone_id": "<domain-2-zone-id>",
      "subdomains": [
        {
          "name": "",
          "proxied": true
        },
        {
          "name": "api",
          "proxied": true
        }
      ]
    }
  ],
  "a": true,
  "aaaa": false,
  "purgeUnknownRecords": false,
  "ttl": 120
}
Let me explain the different configurations a little:
cloudflare– An array of objects, each object representing your configuration for a domain or zone in Cloudflare terminology.authentication.api_token– Should contain a valid Cloudflare API token that can edit a domain’s DNS.zone_id– Your domain’s Zone ID.subdomains– A list of subdomains for your domain. You must have an empty one (“”) for the top level domain and one with the subdomain name for each subdomain (for example “api” forapi.example.com).proxied– This matches the ‘Proxy Status’ in the Cloudflare DNS.falsemeans the DNS record will directly reference your IP,truemeans it will be proxied through a Cloudflare IP, which protects your public IP."a": trueand"aaaa": false– Means you want to use IPv4 and not IPv6.ttl– The time interval (in seconds) that thecloudflare-ddnsscript runs at.
From the folder where you have your docker-compose.yml file, run:
$ docker compose up -dCheck the container logs to see if it’s working properly. To actually test it, you can update your DNS record to some invalid IP and see that cloudflare-ddns updates it.
Hope this helps, have fun clickity-clacking.
Leave a Reply