If you have some simple website that is used by a handful of people, you might want to host it yourself instead of paying for a cloud provider to host it for you. Keep in mind I wouldn’t recommend this for anything serious, but for experimenting at a very low cost it works great.
Nginx Proxy Manager is a web-based tool for managing Nginx reverse proxies, making it easy to configure and secure access to services on a home or business network. It provides a user-friendly interface to handle common tasks like setting up SSL certificates, adding multiple domain names, and routing traffic to internal services without manually editing Nginx configuration files. Ideal for managing connections to services running on Docker, Nginx Proxy Manager is often used for self-hosted applications and supports Let’s Encrypt for automated SSL/TLS certificates.
Let’s Encrypt is a free, automated, and open certificate authority (CA) that provides digital certificates to enable HTTPS (secure connections) on websites. Its mission is to make encrypted connections available to everyone on the internet, enhancing privacy and security. Let’s Encrypt simplifies the process of obtaining and managing SSL/TLS certificates by automating the issuance, validation, renewal, and revocation processes. This way, even those who may not be very experienced with web security can easily set up HTTPS for their sites. The certificates from Let’s Encrypt are trusted by most major browsers and operating systems, ensuring that users visiting your site will see the “secure” padlock icon in their browser’s address bar.
Cloudflare is a company that provides a range of services to improve the performance, security, and reliability of websites and online services. However, for the scope of this article, we’ll be using it only as a registrar.
This solution works with many domain registrars, as long as Nginx Proxy Manager provides an integration with it. However, in this article I’ll be using Cloudflare.
First, a couple of prerequisites.
You will need to have Nginx Proxy Manager installed. If you don’t, here’s a link walking you through setting it up using Docker Compose: https://alexmihai.rocks/2024/11/05/install-nginx-proxy-manager-using-docker-compose/ .
Once you have Nginx Proxy Manager installed, you’ll have to port forward 443 in your router to the IP of the machine running Nginx Proxy Manager. You should also reserve that IP for that machine in the router so that it doesn’t change IPs when you restart it.
Find your public IP. Google it or visit https://www.whatismyip.com/ and take note of your IPv4. We need to point our domain to our public IP address. If your IP is not static you will also need to keep it up to date, so check out this article to find out how to do that: https://alexmihai.rocks/2024/11/11/cloudflare-ddns-to-self-host-under-a-dynamic-ip/ .
We have to add a type A record to the DNS, here’s how that looks like in Cloudflare.

Click ‘Save’ to persist the change.
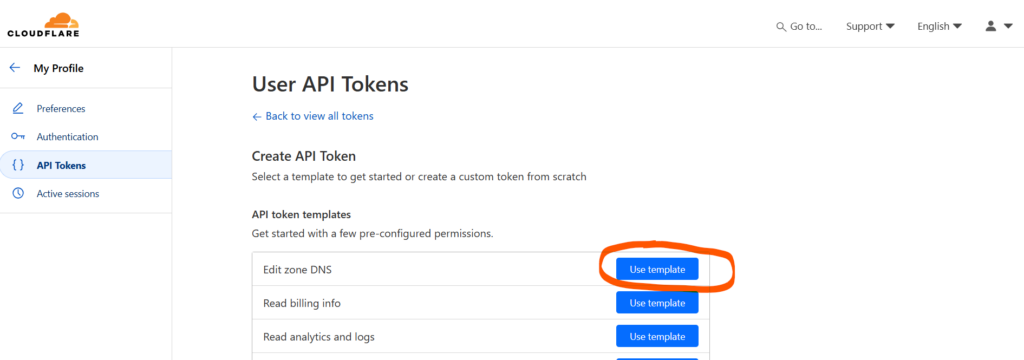
Go to ‘My Profile’ – ‘API Tokens’ – ‘Create Token’. Generate a Cloudflare API token with ‘Edit Zone DNS’ permission.
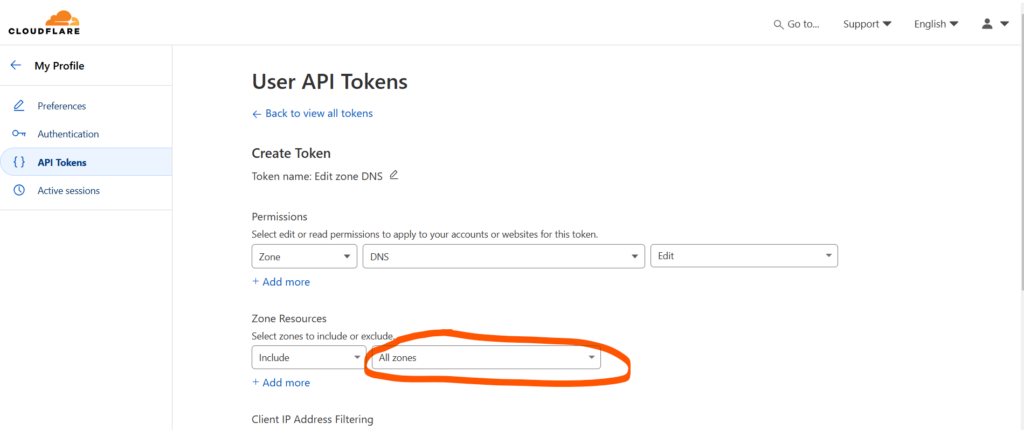
On the next page you can either choose ‘Specific zone’ and select the domain you want to do this for, or ‘All zones’, which allows you to use the same token for all your domains. And yes, Cloudflare calls your domains ‘zones’ for some reason.
Then click ‘Continue to summary’ at the bottom and on the next page click ‘Create token’.
Save the generated token somewhere, you will not be able to retrieve it later on. If you lose it, you’ll have to create another one.
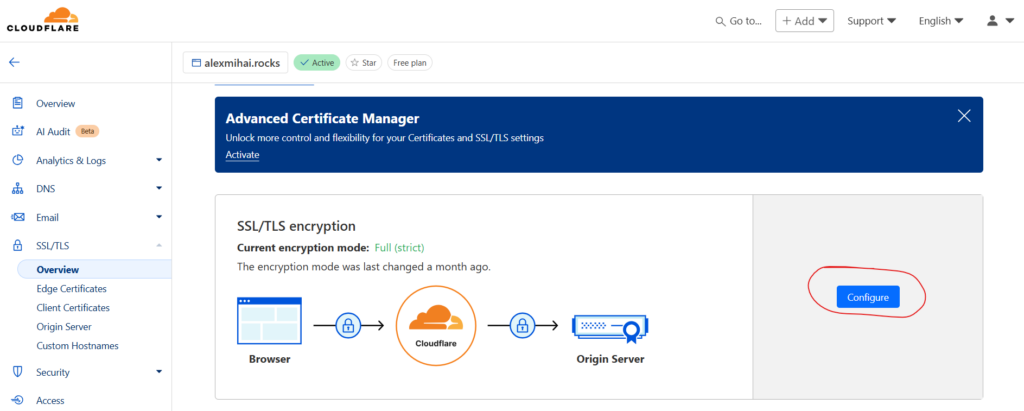
One more thing to do in Cloudflare. Go to your domain’s SSL/TLS settings and click ‘Configure’.
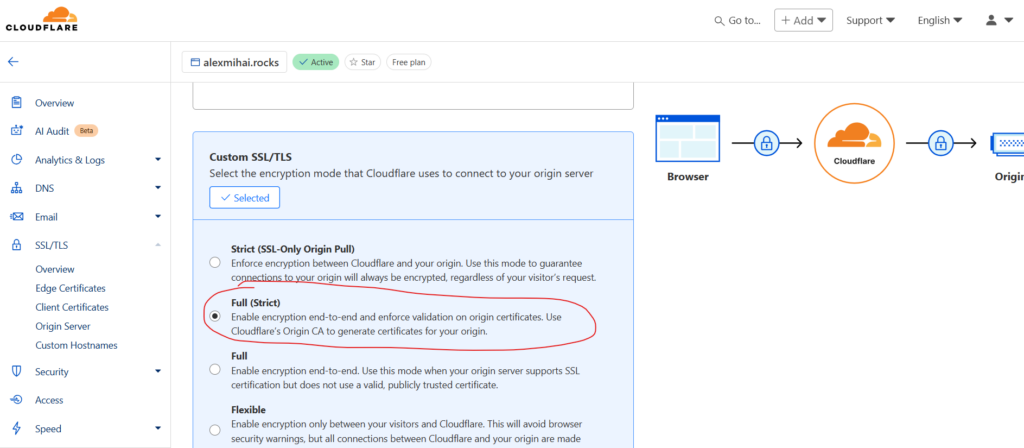
From the ‘Custom SSL/TLS’ section, choose ‘Full (Strict)’ and click ‘Save’ at the bottom.
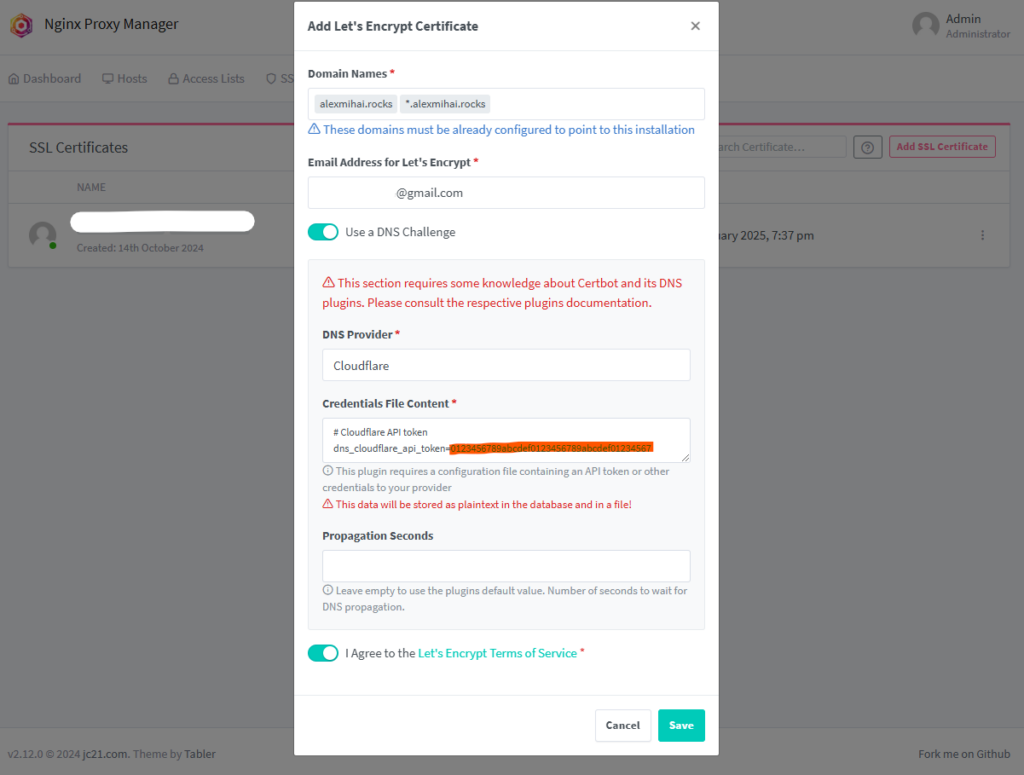
In Nginx Proxy Manager, go to ‘SSL Certificates’ and click ‘Add SSL Certificate’.

Fill in the form. For ‘Domain Names’ enter yourdomain.com and *.yourdomain.com. This will allow you to use the certificate for all subdomains of the domain. Alternatively you can use a distinct SSL certificate for each subdomain. Enter a valid email address, this is how Let’s Encrypt will reach out to you should they need to. For ‘DNS Provider’ choose Cloudflare. In the ‘Credentials File Content’ field paste the Cloudflare API token you generated earlier after the ‘=’ sign. Agree to the terms of service and click save.
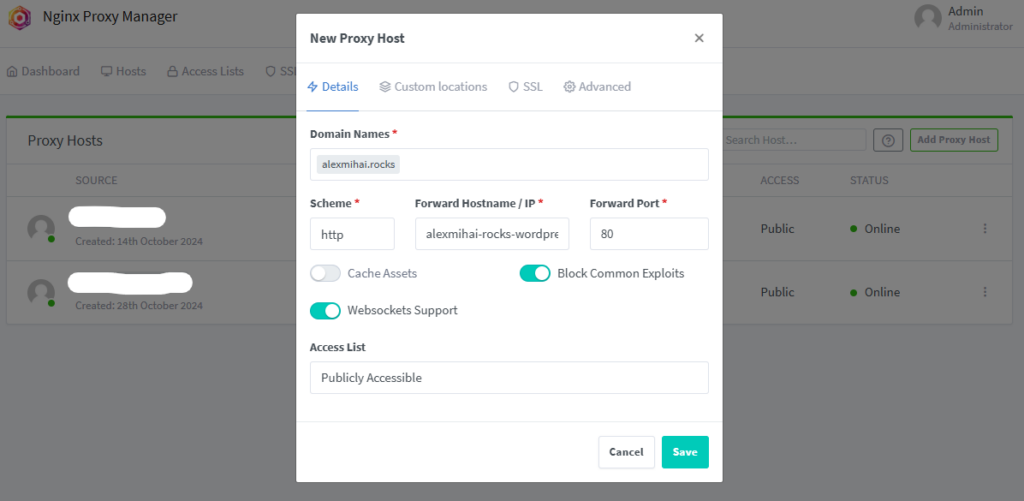
Ok, time to add the proxy host. In Ngin Proxy Manager, go to ‘Hosts’ – ‘Proxy Hosts’ and click ‘Add Proxy Host’.

In the ‘Details’ tab, fill in the domain name and for ‘Scheme’, ‘Forward Hostname / IP’ and ‘Forward Port’ you need to fill in the proper way your service can be addressed by Nginx Proxy Manager. The ‘Scheme’ will most likely be http unless you’re hosting a service that already has some sort of certificate. For ‘Forward Hostname / IP’ and ‘Forward Port’ you can enter the IP/port that you use to access the service or, if the service is in the same docker network as Nginx Proxy Manager, you can provide the container name and the container exposed port, like in this example here. Enable the ‘Block Common Exploits’ and ‘Websockets Support’ options.
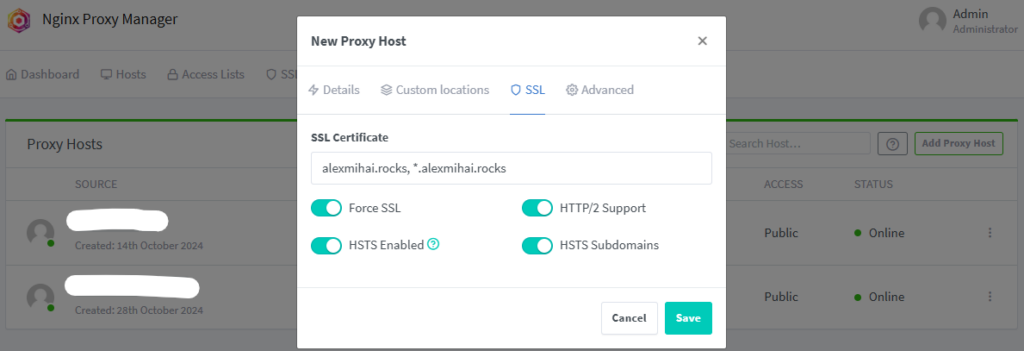
In the SSL tab select the certificate you created earlier corresponding to this domain and enable all options. After that click ‘Save’.
Try accessing that domain in the browser, it should now show the service you have proxied.
Hope this helps, have fun clickity-clacking.
Leave a Reply