This short tutorial will walk you through transferring your domain name that’s currently registered with Name.com (or some other registrar for that matter) to Cloudflare.
TL;DR
- Unlock the domain and remove WHOIS privacy in Name.com
- Add a website for that domain in Cloudflare
- Update nameservers in Name.com to the ones assigned by Cloudflare
- Get authorization code from Name.com
- Transfer domain in Cloudflare
- Confirm transfer in Name.com
Prerequisites
- You already have a Cloudflare account. If not, you can create one for free at cloudflare.com.
- You have some domain registered with Name.com or some other registrar that you would like to move to and manage with Cloudflare.
Reasons to change registrars
Reasons may vary for everyone, but for me it was mainly about:
- Cost: For me the domains hosted on Name.com were about 60-70% more expensive than moving to Cloudflare. I realize this might change in the future based on the pricing, but at the time of this writing this is the case. This might not be a big deal in itself given the very low cost of domains, but in conjunction with the second point it counts.
- Features: Cloudflare has a more rich feature set. This might also change in the future I guess, but things like Zero Trust, caching, WAF, analytics, Under Attack Mode are nice to have and some version of them comes with the free tier. For example you get analytics with only 1h resolution, but it’s free and comes out of the box.
Let’s do it
When I wanted to first transfer one of my domains to Cloudflare, I found the process a bit confusing due to the lack of documentation on the Cloudflare side. So, if you are new to Cloudflare, or at least to the domain transferring feature, this walkthrough might help you.
Attempting to go to the ‘Transfer Domains’ section in your Cloudflare account will present you with the following screen:
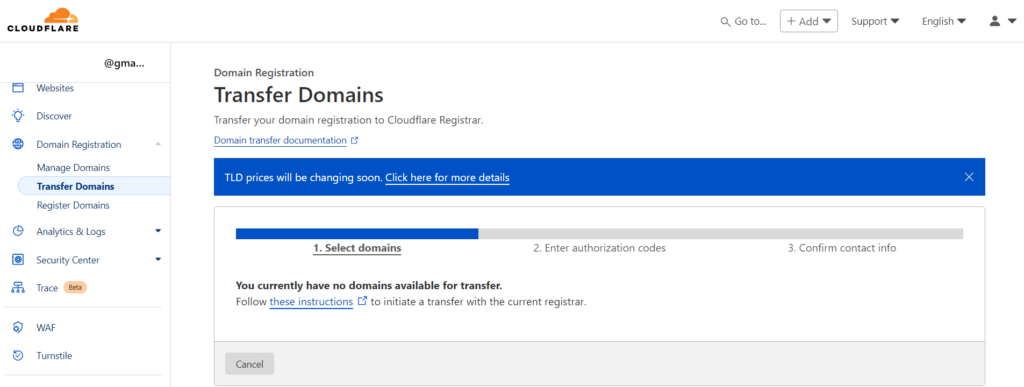
While following the these instructions link does provide useful information, it’s only partial, you’ll have to complete a few more steps. So here is a complete list of what you have to do:
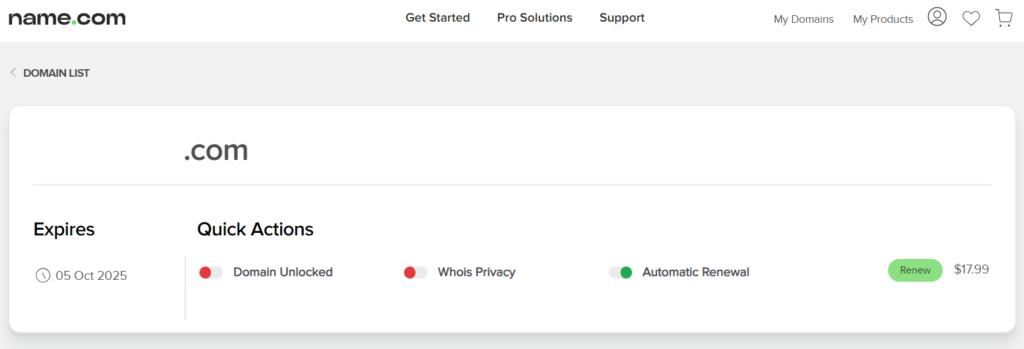
In your current registrar account, unlock the domain and remove WHOIS privacy. This is how that looks on Name.com:
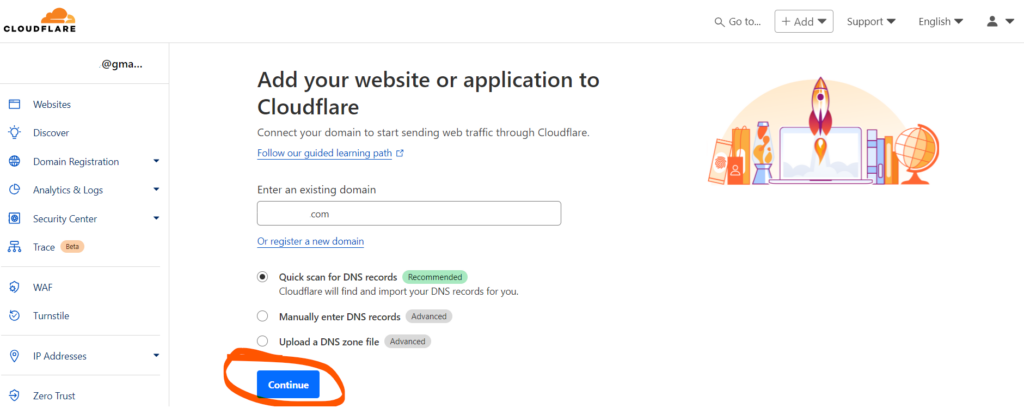
Go to ‘Websites’ in the main menu and ‘Add a domain’:

Enter your domain name and click ‘Continue’:
On the plan selection page click ‘Free’ at the bottom and click ‘Continue’:

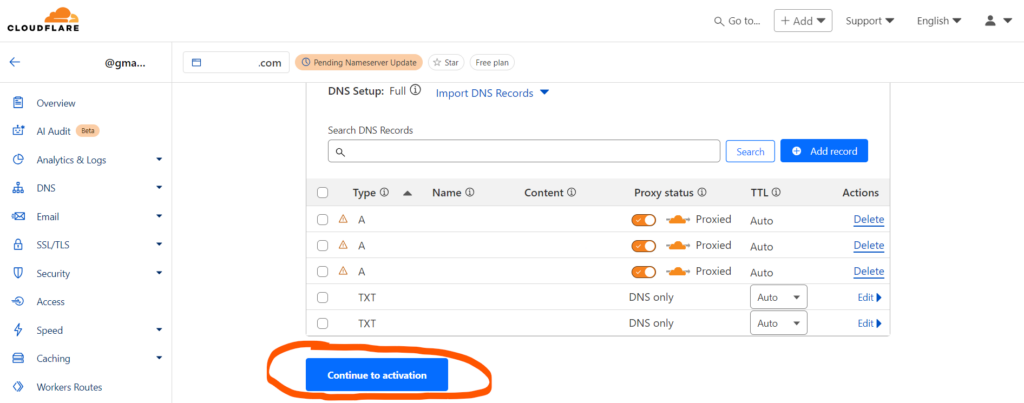
Depending on your DNS records, you might be asked to confirm the DNS setup. If needed, double check the records and confirm by clicking ‘Continue to activation’:
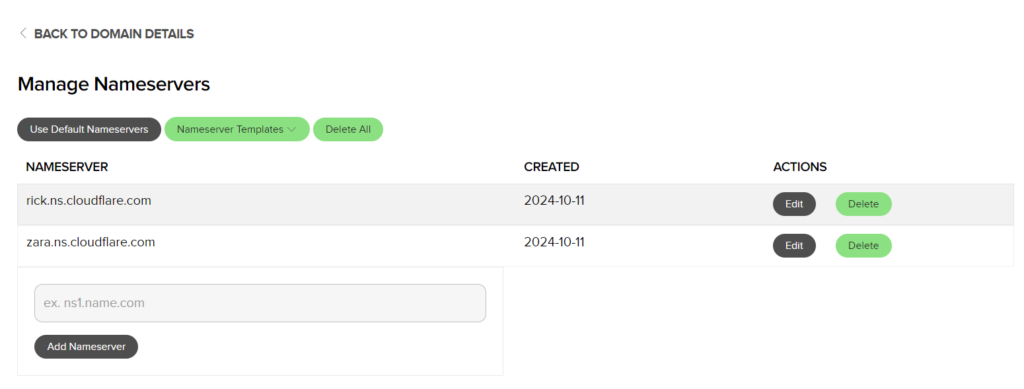
On the next page it tells you to update the nameservers on your current registrar to a couple of specific nameservers assigned to you by Cloudflare, so we’ll do that. Here’s how that looks on Name.com:
After updating, you can now click ‘Check nameservers now’ on the Cloudflare page:
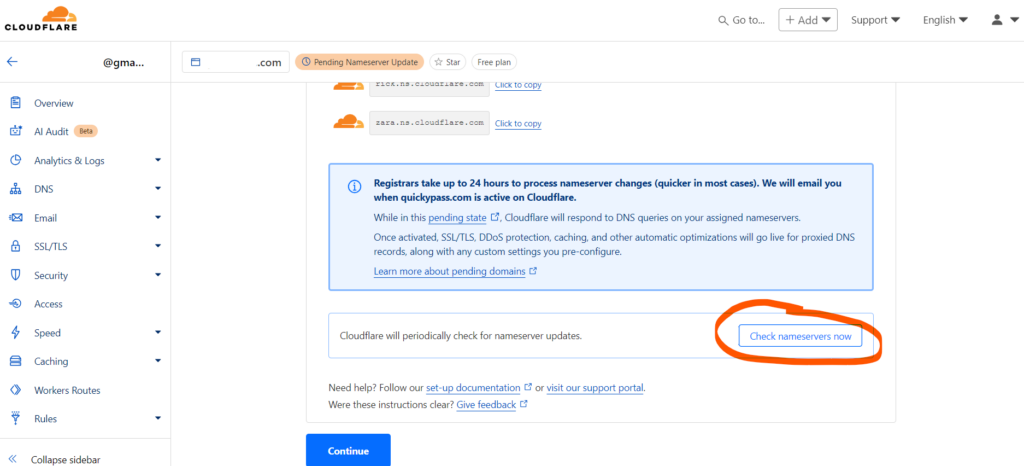
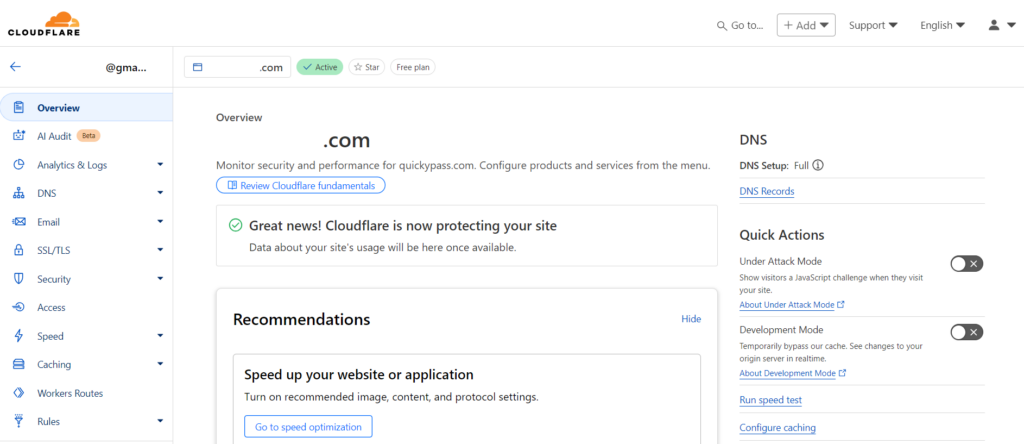
Now you have to wait for an undetermined amount of time (24h max) while your site is in ‘Pending Nameserver Update’ status. Once that is done, you will see this message on your Cloudflare site page:
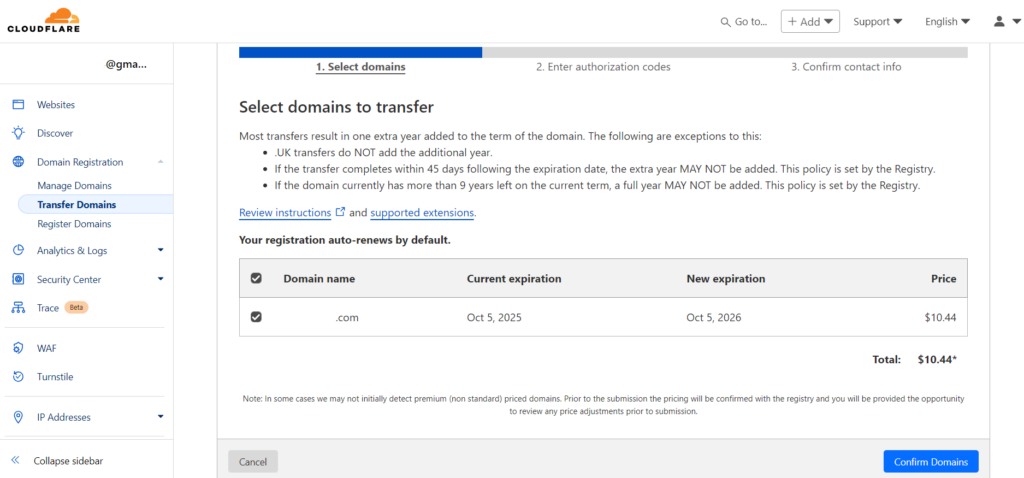
Now you can go to the main page of the dashboard and click ‘Domain Registration’ – ‘Transfer Domains’. On this page you will see how much you will be billed for the domain you want to transfer. Select the domain you want to transfer and ‘Confirm Domains’:
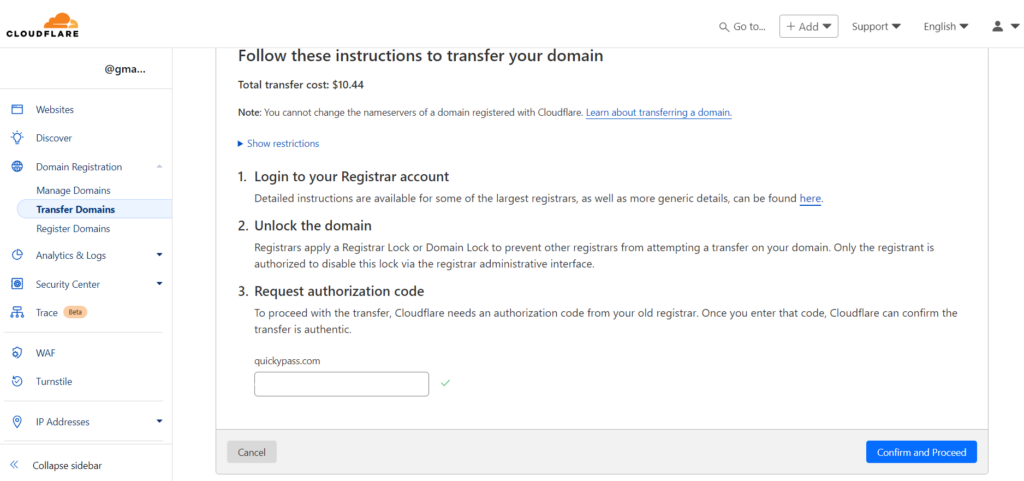
Follow the instructions on the next screen, but since you should have already unlocked the domain on the first step, you just need to get the authorization code. Here’s how that looks on Name.com:

Copy the code and paste it in Cloudflare. If it’s valid you will see a checkmark. Then click ‘Confirm and Proceed’:
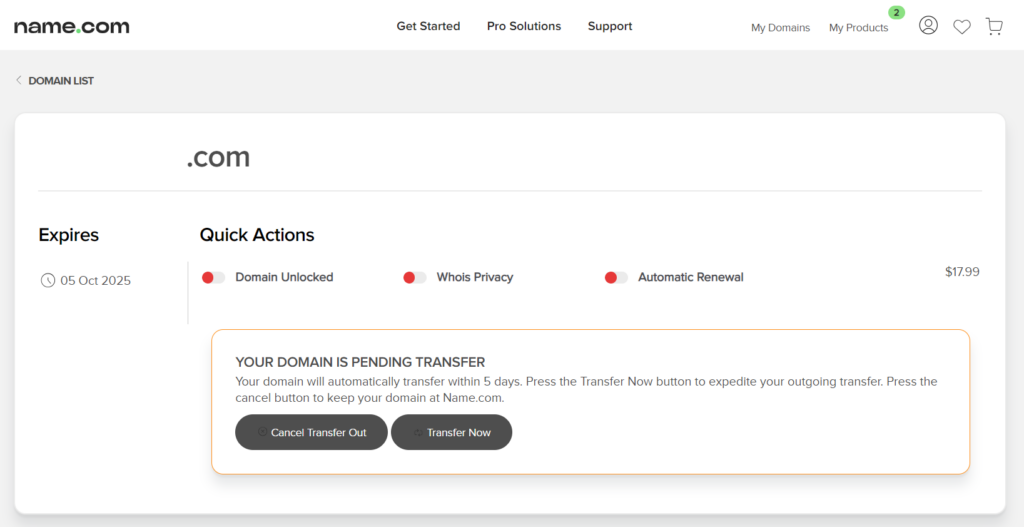
On the next page, confirm all your personal information and click ‘Confirm and Finalize Transfer’. On Name.com or your particular registrar, you can confirm the transfer. Here’s how that looks on Name.com:
Go to the domain in Cloudflare (click ‘Manage’ next to the domain) and click ‘Refresh’:
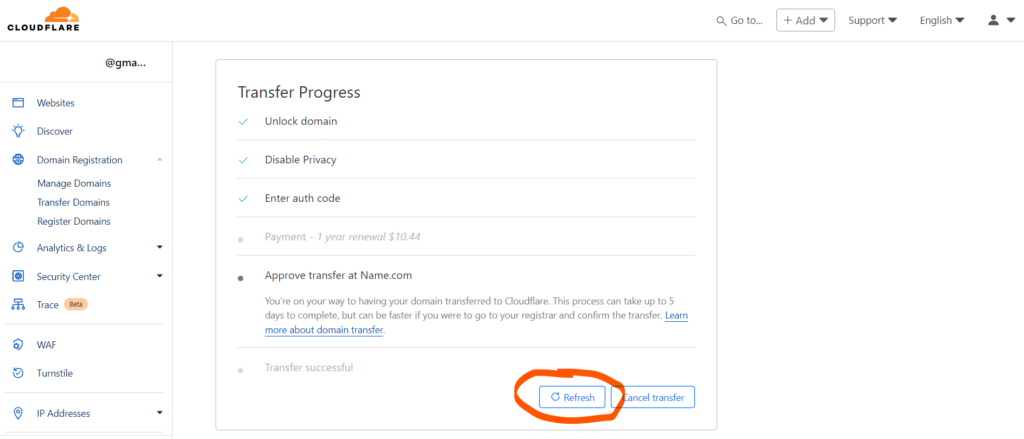
That’s it, your domain is now fully transferred to Cloudflare.
Hope this helps, have fun clickity-clacking.
Leave a Reply