If you, like me, are into self-hosting different applications and would also like to start experimenting with Kubernetes (k8s), either to simply learn or to improve the resilience of your self-hosted applications, this article will walk you through the step by step process of setting up the cluster.
Hardware
The first thing you will need to think about is what hardware to install the k8s cluster on. There are of course multiple solutions you can adopt, starting from an old PC or laptop you have, a bunch of VMs either in the cloud or that you are self-hosting, or even a few physical machines.
This last option is actually what I wanted, multiple physical machines so I can have a resilient cluster where I can bring one down for maintenance and where I can setup resilient/redundant storage. And I didn’t want VMs so that I don’t deal with multiple levels of virtualization. 3 machines are enough to achieve this. In a previous article I looked at a basic comparison of a Raspberry Pi 5 vs a refurbished mini-PC, and my conclusion was that 3 refurbished mini-PCs are the way to go.
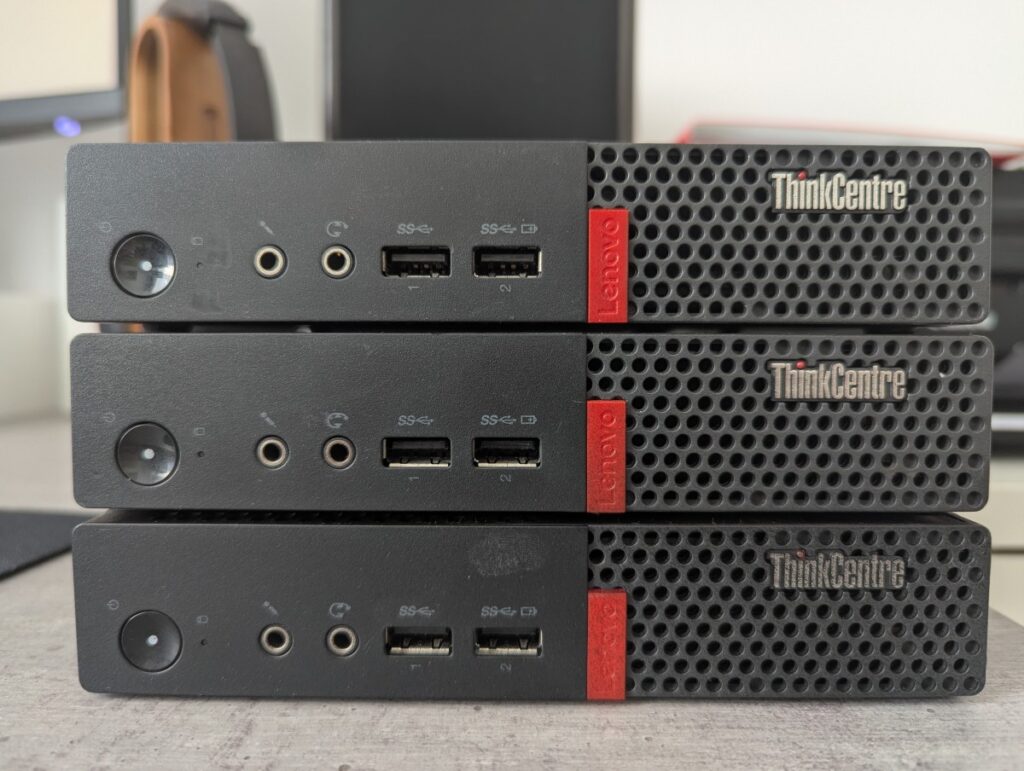
Without further ado, here is my cluster, front and back view:
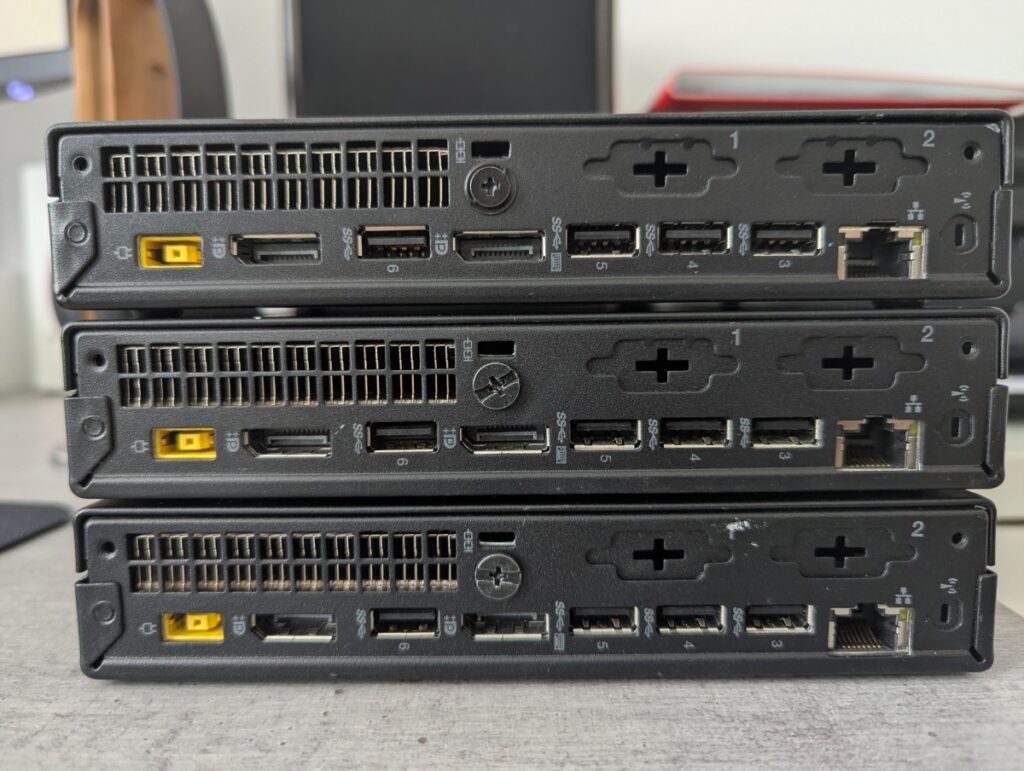
I chose to add an SSD to each machine besides the OS one, so that there is a dedicated drive specifically for Longhorn. More on this later, but it’s not mandatory.
The only thing I’ll mention regarding your physical machines is that if they look identical, you should label them with the host names you plan on giving them so that you don’t confuse them when you’ll need to do any maintenance.
OS and k8s software
You have a bunch of options for both the OS and the k8s cluster.
You can choose from the huge number of Linux distributions to host your cluster. There is even Talos Linux, which is a distro specially designed for k8s clusters. However, I chose Ubuntu Server, mainly because it’s the one I’m most familiar with.
Now you have to choose a variant of Kubernetes to install on your cluster. You can, of course, install k8s itself, but you should be aware that the k8s control plane itself is pretty heavy on resources, so the machines you are running it on should be pretty beefy. However, people have built more lightweight alternatives. I went with k3s because it seems to be the more popular choice and it’s a CNCF project. A notable alternative is microk8s, which is created by Canonical, the company that’s behind Ubuntu.
To install k3s, you can follow the official docs, but I will leave the commands I ran here, especially because I did something extra.
First off, update your system:
$ sudo apt update && sudo apt full-upgrade -y
Install curl if not already installed:
$ sudo apt install -y curl
...
$ curl --version
curl 8.5.0 (x86_64-pc-linux-gnu)...
Next, you should disable swap. This is important because you shouldn’t overload the memory on your nodes to the point where they start using swap, as this leads to performance issues.
$ sudo swapoff -a
$ sudo sed -i '/ swap / s/^/#/' /etc/fstab
On the first node/machine run this command to install k3s:
$ curl -sfL https://get.k3s.io | sh -s - server --cluster-init
After it’s done, get the k3s token:
$ sudo cat /var/lib/rancher/k3s/server/node-token
Copy the output, you will use it in the following commands. On the other 2 nodes (or however many you decided to setup), run:
$ curl -sfL https://get.k3s.io | K3S_TOKEN=<token> sh -s - server --server https://<first-node-ip>:6443
Replace <token> with the token you got from the first node and <first-node-ip> with that node’s IP address. To be clear, this means the internal IP within your local network, not the public IP (if it has one).
That’s it, you can check everything went well by running:
$ sudo k3s kubectl get nodes
[sudo] password for user:
NAME     STATUS   ROLES                       AGE    VERSION
node1   Ready    control-plane,etcd,master   1d   v1.32.4+k3s1
node2   Ready    control-plane,etcd,master   1d   v1.32.4+k3s1
node3   Ready    control-plane,etcd,master   1d   v1.32.4+k3s1
Install and configure kubectl and helm
In order to interact with the cluster, you should install kubectl and helm on your local computer.
For kubectl you can check the official docs for the right setup for the OS you are running. I run Ubuntu Desktop, so here’s what I did:
$ sudo apt install -y apt-transport-https ca-certificates curl gnupg

$ curl -fsSL https://pkgs.k8s.io/core:/stable:/v1.33/deb/Release.key | sudo gpg --dearmor -o /etc/apt/keyrings/kubernetes-apt-keyring.gpg
$ sudo chmod 644 /etc/apt/keyrings/kubernetes-apt-keyring.gpg

$ echo 'deb [signed-by=/etc/apt/keyrings/kubernetes-apt-keyring.gpg] https://pkgs.k8s.io/core:/stable:/v1.33/deb/ /' | sudo tee /etc/apt/sources.list.d/kubernetes.list
$ sudo chmod 644 /etc/apt/sources.list.d/kubernetes.list

$ sudo apt update
$ sudo apt install -y kubectl
Check by running:
$ kubectl version --client
Client Version: v1.33.4
Kustomize Version: v5.6.0
To connect it to your k3s cluster, run this on any of your k3s nodes:
$ sudo cat /etc/rancher/k3s/k3s.yaml
Copy the output to your local machine at this location: ~/.kube/config
$ mkdir -p ~/.kube
$ nano ~/.kube/config
However, make sure to change the line that says server: https://127.0.0.1:6443 to an IP of one of the nodes, something like server: https://192.168.68.115:6443.
Test it’s working by running:
$ kubectl get nodes
NAME     STATUS   ROLES                       AGE    VERSION
node1   Ready    control-plane,etcd,master   1d   v1.32.4+k3s1
node2   Ready    control-plane,etcd,master   1d   v1.32.4+k3s1
node3   Ready    control-plane,etcd,master   1d   v1.32.4+k3s1
For helm you can, again, check the official docs, but the TLDR is:
$ curl https://raw.githubusercontent.com/helm/helm/main/scripts/get-helm-3 | bash
$ helm version
version.BuildInfo{Version:"v3.17.3", GitCommit:"e4da49785aa6e6ee2b86efd5dd9e43400318262b", GitTreeState:"clean", GoVersion:"go1.23.7"}
We’re done, in future articles I will talk about installing:
- Longhorn for distributed, resilient storage
- MetalLB for providing a virtual IP that you can port forward to from your router
- Cert-Manager for getting and maintaining Let’s Encrypt SSL/TLS certificates
- Argo CD for gitops, having your applications automatically deployed by just changing their definition in git
Hope this helps, have fun clickity-clacking.
Leave a Reply